The Chef’s Board
This rapid product design exercise was built around using mui Boards, a product of low tech smart home devices that took on the appearance of wood fixtures, but have interactable lights installed under the surface to complete different tasks. While smart home technology continues to advance, more and more people are becoming tired of constantly having screens in their faces. These boards are fantastic way to combine sleek aesthetic with modern tech in a smart, effective manner. With this baseline in mind, I created the idea of the Chef’s Board after a few sketching processes.
The basic premise, which I’ll go much more into detail on further down this page, was a mui Board that resembled a wooden cutting board, and could be used as such, but offered a wide range of AI and AR features to assist in the cooking process. One of the premises of this exercise was a device that was in some ways futuristic, but realistic to the point it could exist in a few years. With this in mind, with the help of this handy assistant, a person could easily follow recipes, keep track of their ingredients, learn how to execute portion control, and so much more.
Step 1: Sketching It Up
To quickly go through my design thoughts during the initial sketches, I wanted to focus on ideas that were simple, ideas that complimented the minimalist style of the mui Board. The first idea, of course, was the Chef’s Board. Some of the other ideas included an AI based outfit selector that could detect what clothing you had available, simple boards that could display notifications or weather reports, a simple game board, and much more. Truly with this baseline, there is a lot that can be done.
The first thing I thought of when I saw the mui Boards was the fact that the wood texture reminded me of a cutting board. I’ve been trying to cook more in my day to day life, so a smart device that could use AR and AI to help me out while also being a physical tool like a cutting board sounded incredible. From there, I sketched out 10 additional ideas of what a cooking helper could look like using the mui Board as a baseline. Then I decided on the name Chef’s Board.
All these ideas combined together into one device made me feel confident that I was on to something special. Something that looked like a wooden cutting board that was actually a fully fleshed out cooking assistant, backed with AI and AR technology. I began to sketch out general ideas of what the Chef’s Board could look like, which lead to my design work you can see on the right.
From there, I created general sketches for the design of the board and even drafted up storyboards. All this sketching was done with the intention of presenting it to potential users for their evaluation. By doing this, I could feel much more confident about what needed to be fixed or changed before moving onto physical prototyping.
Step 2: Sketch Evaluation with Users
With the sketches done, they were presented to someone for an informal evaluation. The individual was a 50 year old woman who was quite skilled with cooking but felt bogged down with having to keep track of everything from time to time. Her insight was incredibly useful. For starters, she believed that the device should have minimal buttons and suggested it use voice recognition to interact with the user. Her reasoning for this was due to how messy her hands get while cooking, she would hate to touch the device with her hands too much. Another excellent point was that she did not want the Chef Board to speak at her. When she’s cooking, she usually watches TV or is listening to music, so having the device speaking to her constantly would be a hindrance. She suggested just having text appear on screen and perhaps have the device “buzz” in some way to alert the user that it is trying to tell them something.
Step 3: Building a Physical Prototype
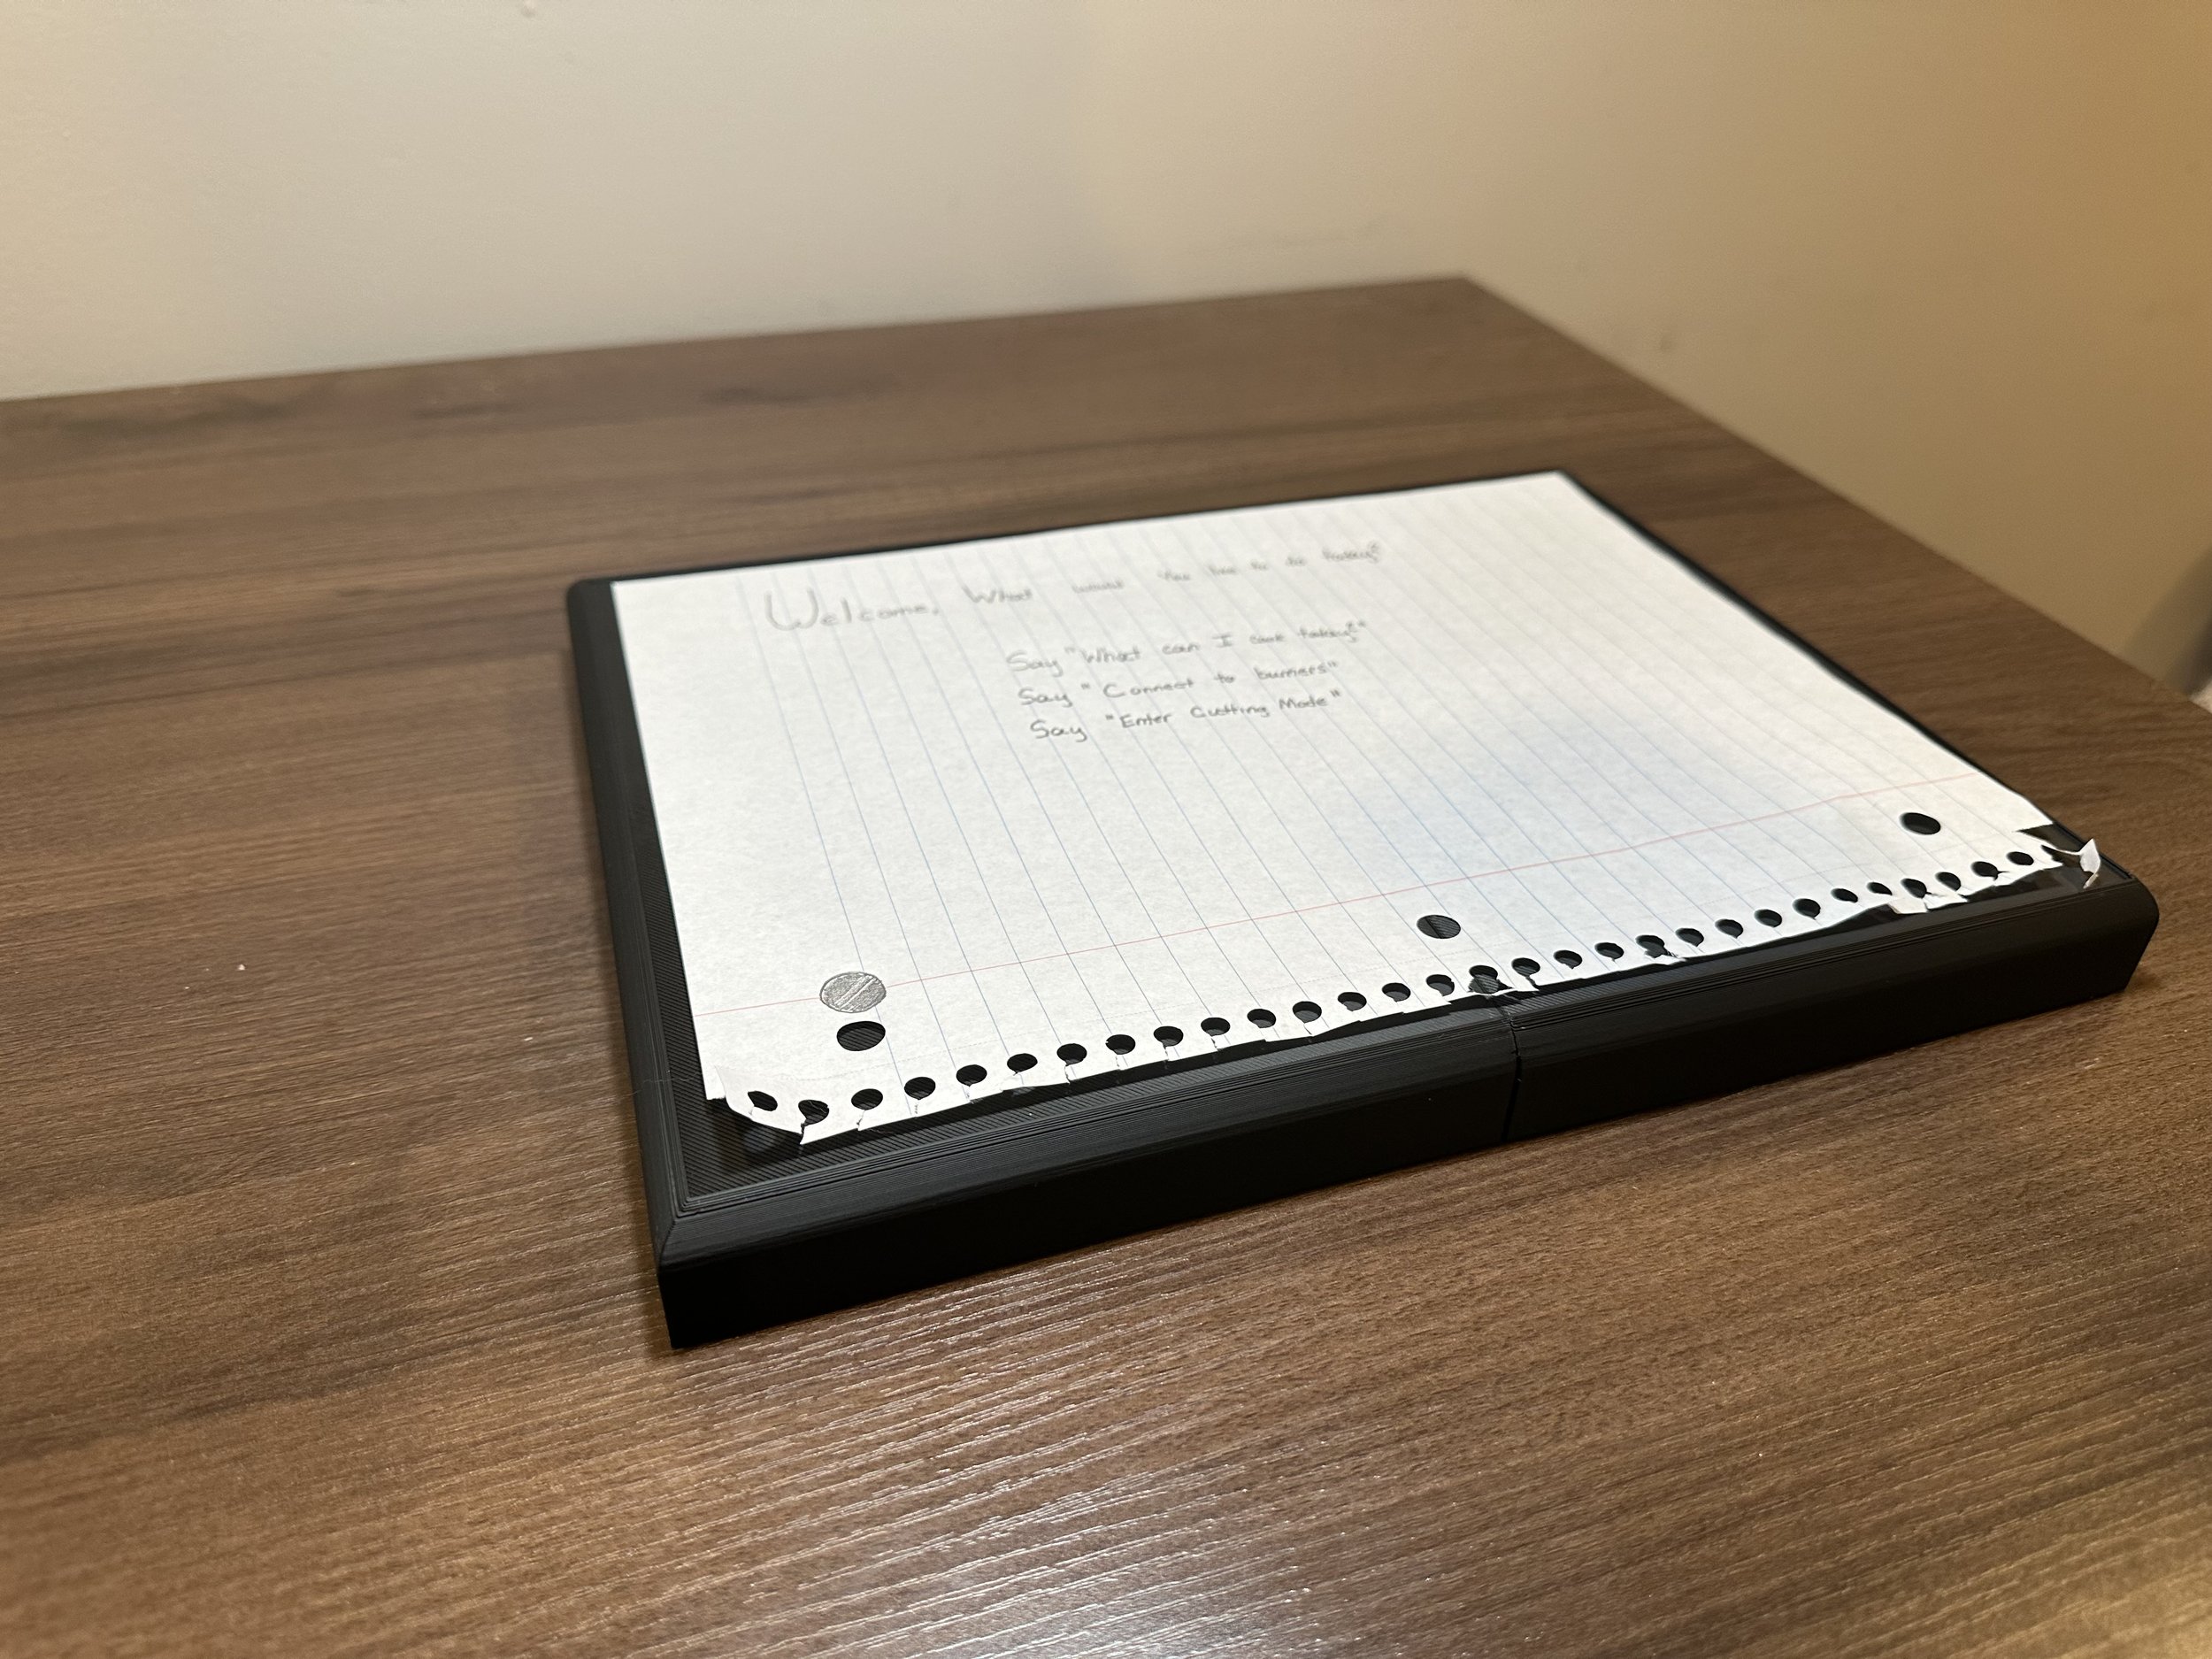
With this valuable insight, it was time to move on to making a physical prototype. I was quite excited for this step as it gave me the opportunity to design and print something with my 3D printer. Using black PLA, the basic frame of the Chef’s Board was made. Being a cutting board and needing to display a good amount of information at a decent size, it made sense that the device would need to be a bit bigger. For size reference, I decided to make the device a bit bigger than a standard piece of paper (8.5x11 inch), as it would make it easier to draw out and insert the “screens” for the prototype and I felt it was a good base size.
Step 4: Prototype Evaluation with Users
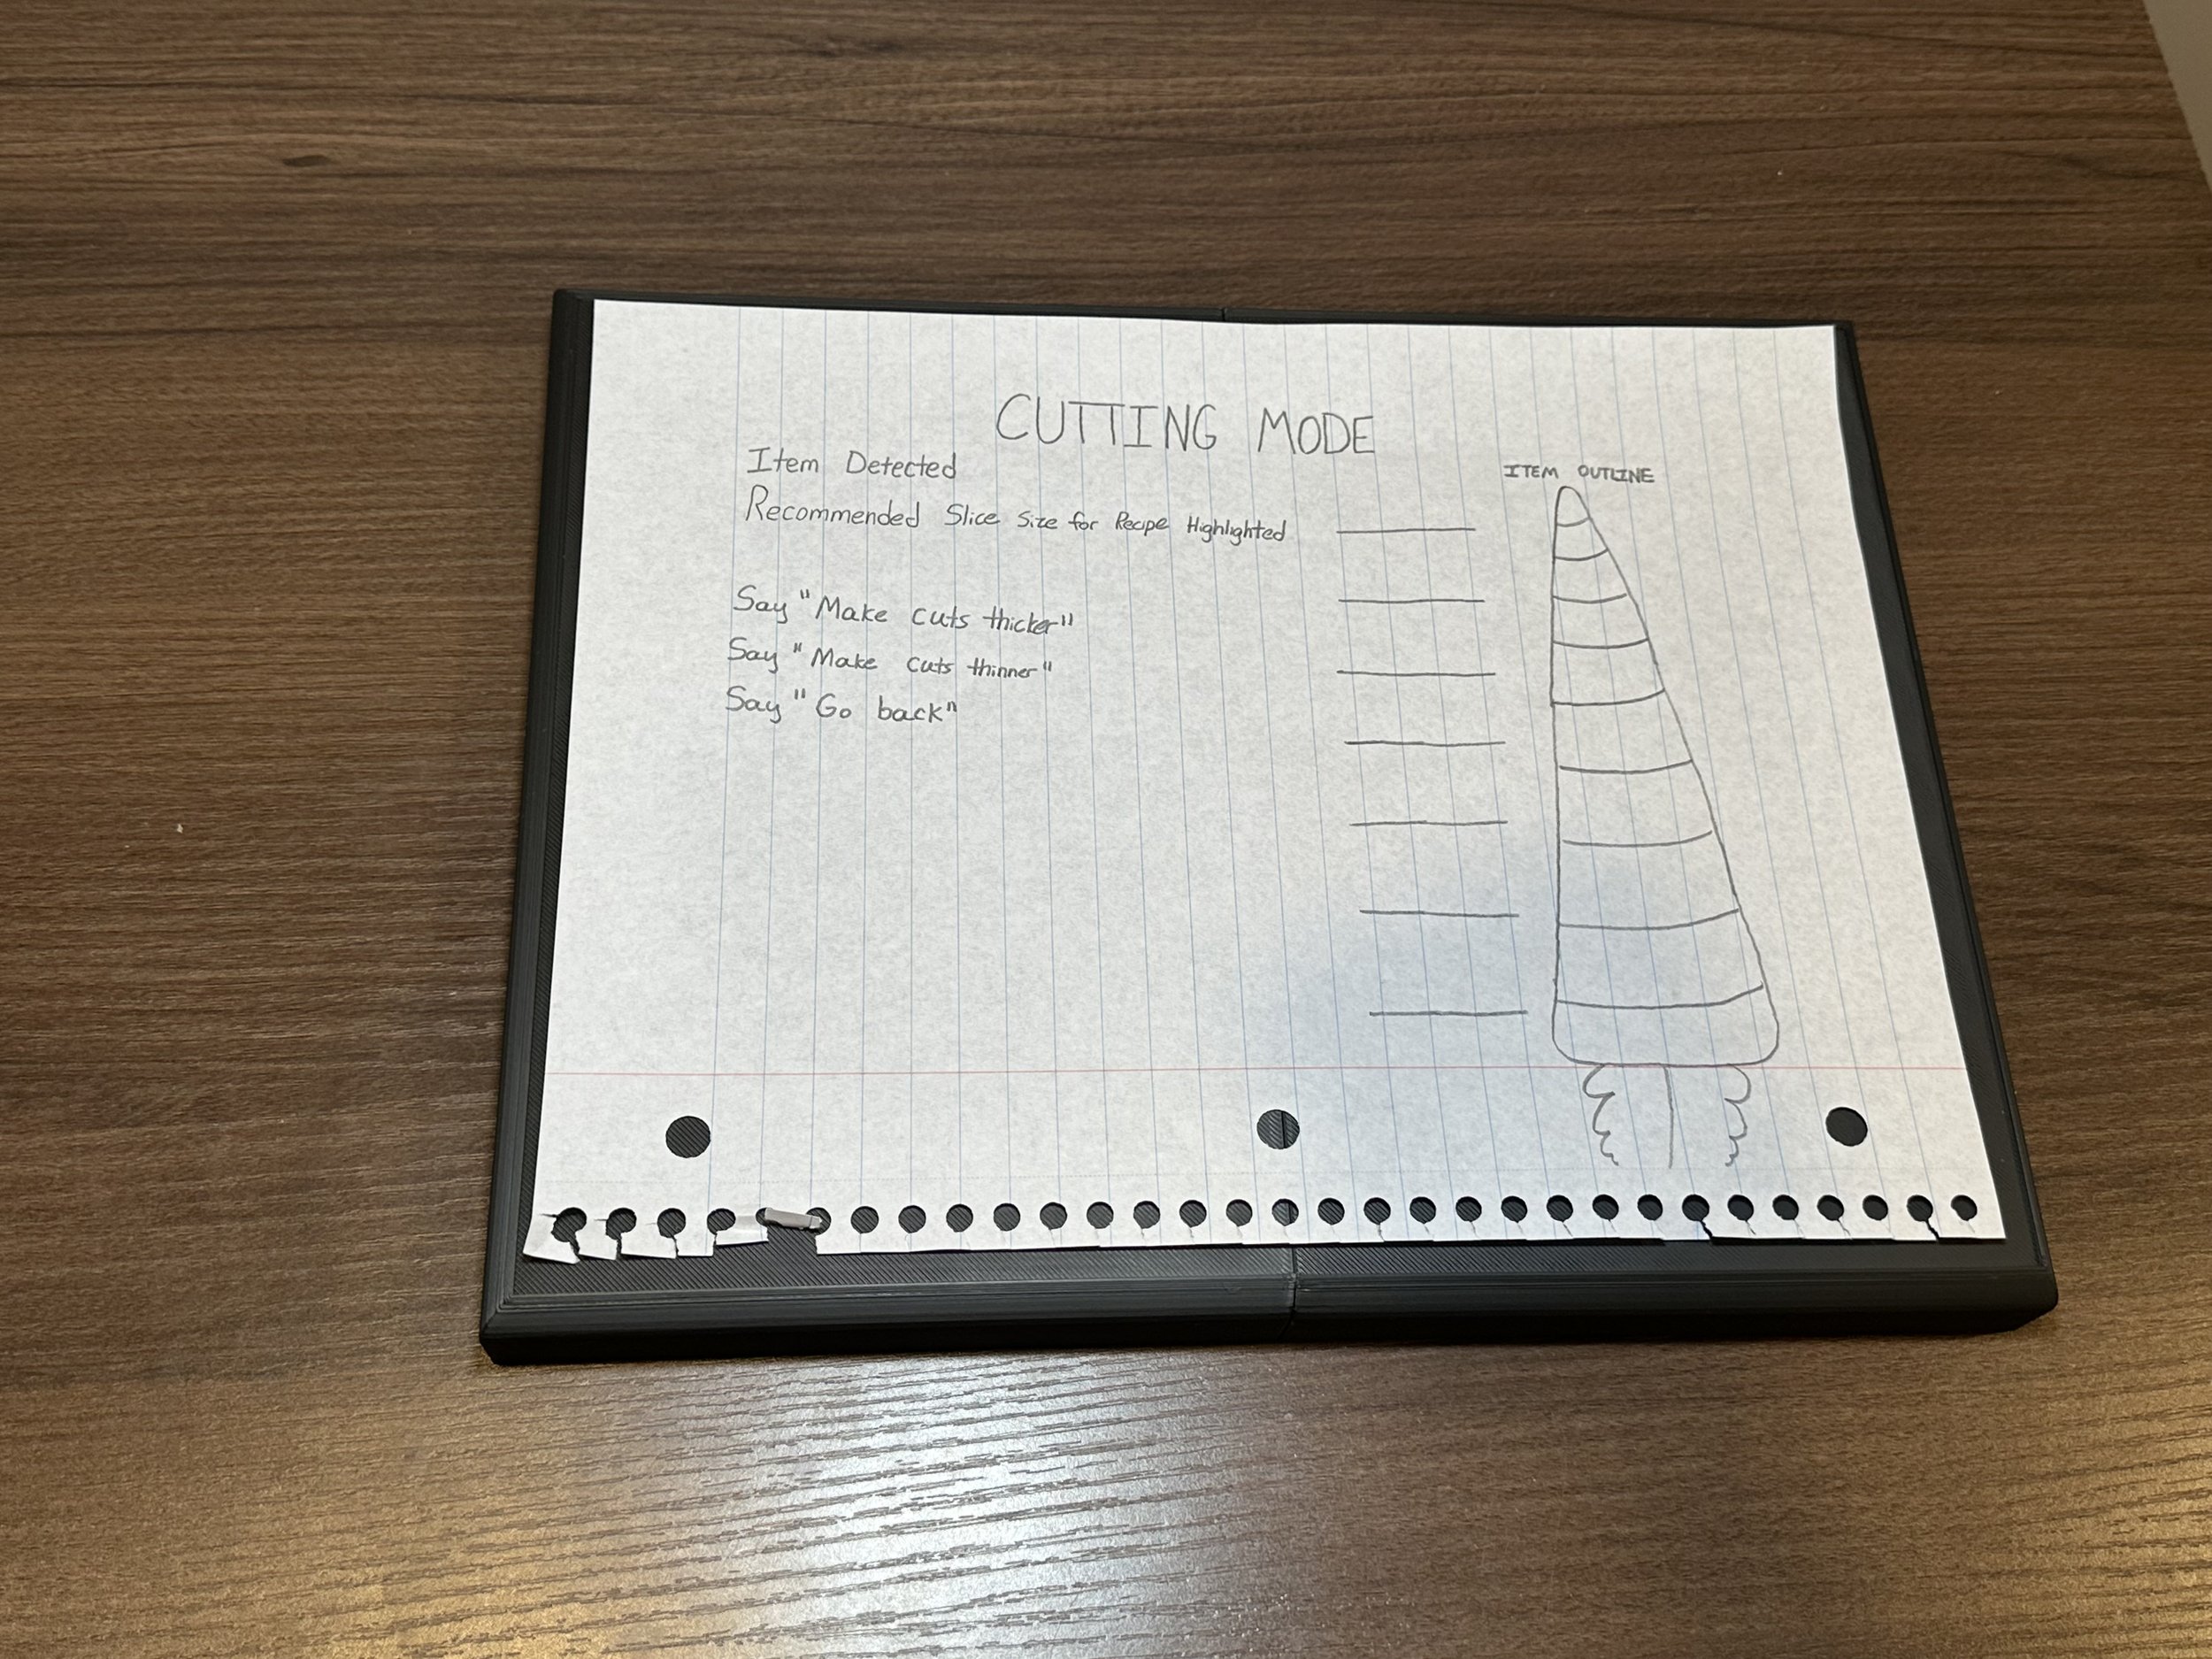
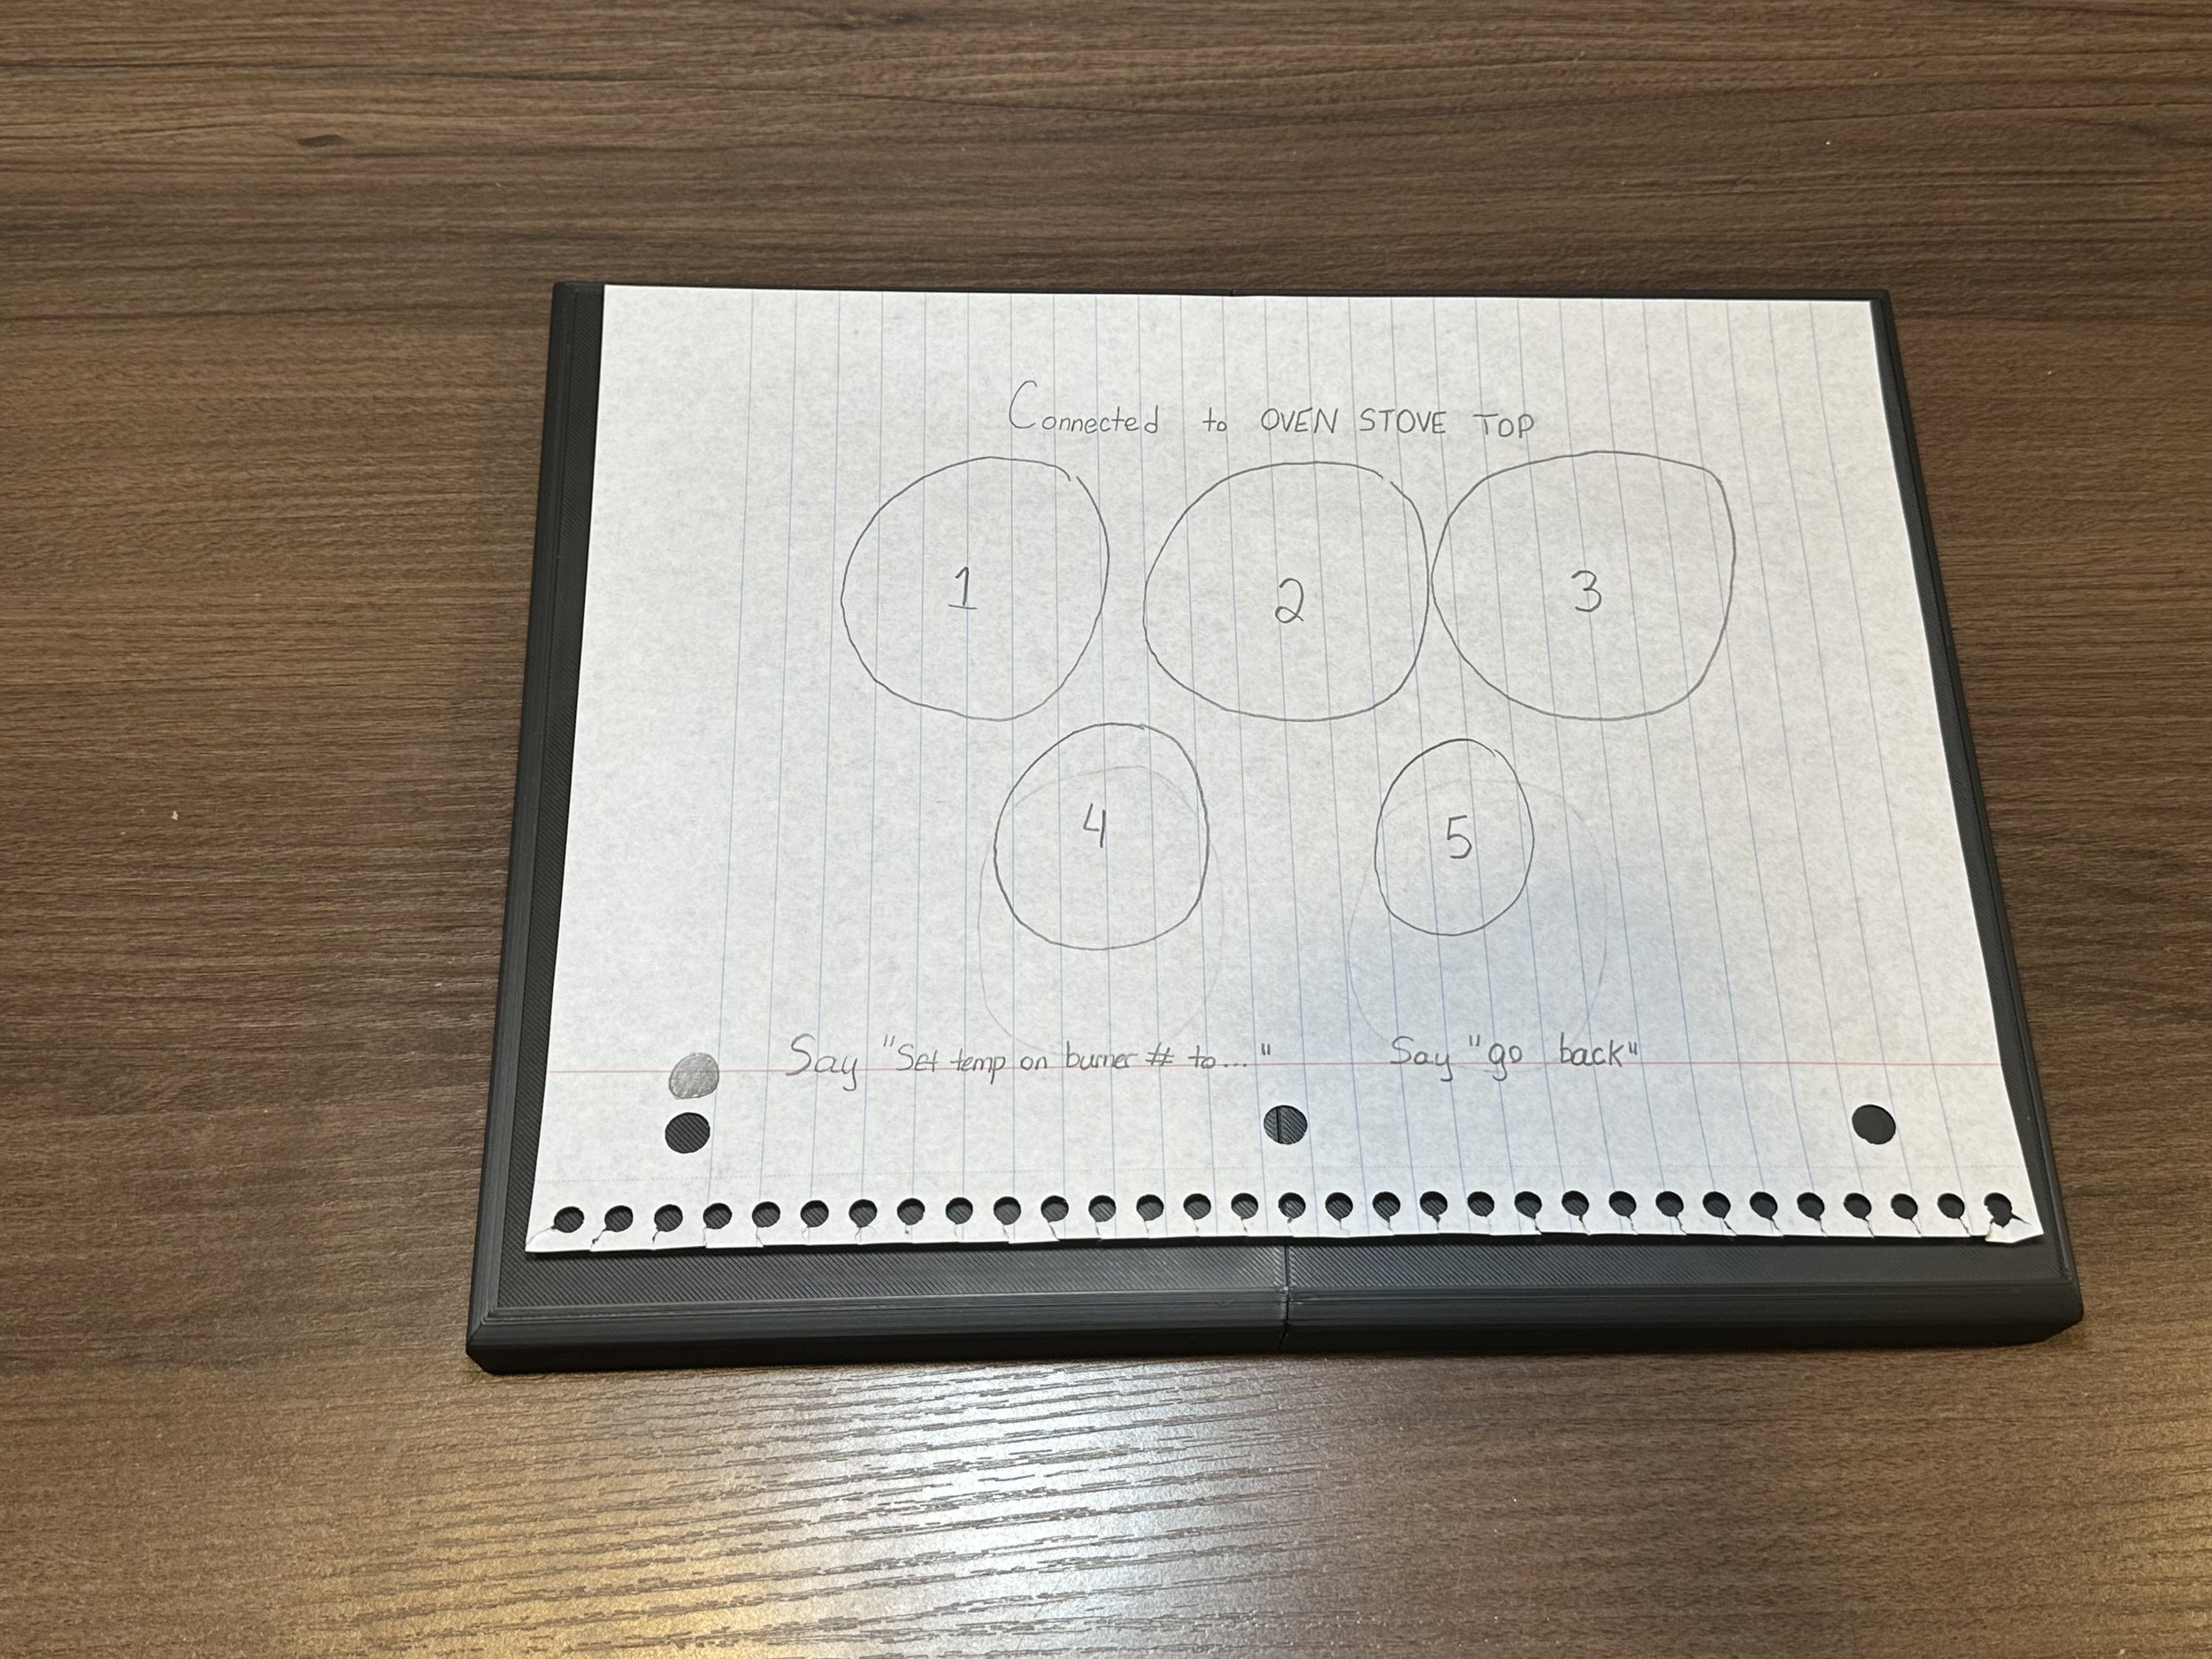
For this part, the prototype was taken to where it would be used in the real world, a kitchen! Two individuals joined us, the woman from before (who will be listed as Person 1) and also a man who was 26 years old and had less experience with cooking, but a lot more experience with technology (Who will be listed as Person 2). They were both told to follow what it said on the sheet to say, which were supposed to represent specific voice prompts. Whenever they activated a voice prompt, the “screen” was changed by myself. They both overall enjoyed the idea of the design but had some issues as well.
For starters, Person 1 discussed their issues with putting certain types of food onto a device such as this. They feared that items such as chicken would leave residue that could contaminate food, and she stated that the device would need to be fully waterproof to be washable. She also prefaced by saying her feelings on this were due more to the fact she was not used to technology such as the mui Board, and that this concept in general was foreign to her, but she knew allowing germs on her screen was a bad thing.
While Person 1, during the sketching phase, emphasized having less buttons to press and instead focusing on vocal commands, Person 2 pointed out almost immediately how someone who is mute would be unable to access the board in its current state. As Person 2 worked through the test, they were very appreciative of the idea of including AR technology to assist in such tasks as cutting vegetables (in this case on the drawn screen was a carrot), as they have issues making sure they cut ingredients to an appropriate size for the dish they are making. They even mentioned the idea of having the cut lines appear in red, and when the board senses the knife on one of the cut lines, it can turn green. This would help in cutting things incredibly thin.
A pattern that I noticed as both people evaluated the physical prototype was how easily they were able to voice out their commands. This is more than likely due to the emergence of vocal assistants in smartphones, such as Siri, and other smart devices, such as Alexa, but it felt incredibly natural for both people despite the age gap. I feel that being able to speak aloud what you wish for a piece of technology to do can be a lot more freeing than having to worry about hitting the right buttons or going to the correct screen.
Step 5: Conclusions
Overall, my work on this project taught me that there is rarely a truly “bad” idea, just ideas that need more fleshing out. With technology changing every day, it opens up paths to create and design new experiences for people all over the world. Working through the process and creating a physical prototype to try out, especially in a real world environment such as a kitchen, was great practice. It showed me just how much the attitude and feedback can change when you’re “out in the field” instead of just designing something for a mobile app that will be experienced on a phone. Working through how the board would work, how its features would be accessed, and keeping in mind the limitations of keeping it minimalistic, was a challenge that I enjoyed tremendously.
The Sketches of Chef’s Board
The Physical Prototype of Chef’s Board


